

How To Make Matte Background In Photoshop
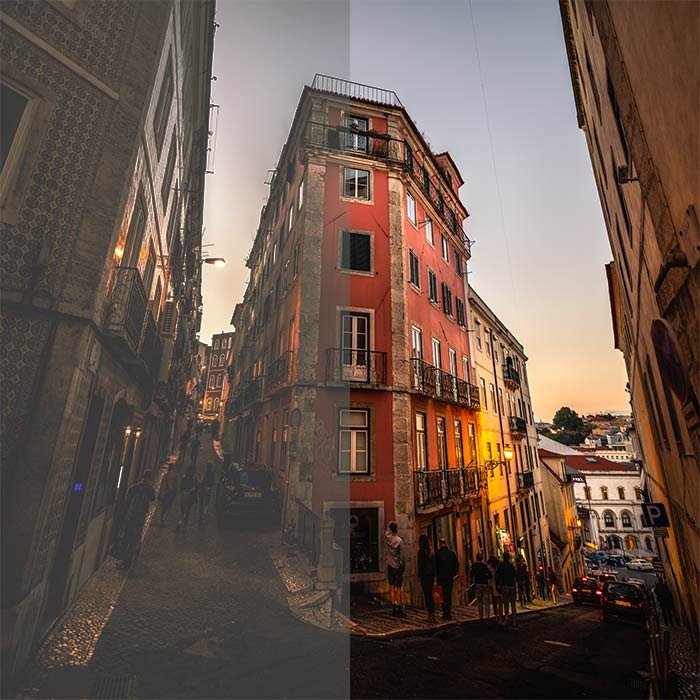
While browsing for inspiration, you lot will inevitably bump into photos edited in a faded, matte effect. This matte look gives images a hazy, yet warm experience. Fortunately, information technology's straightforward to do yourself.
We testify you how to hands create a matte effect in Photoshop!


What You Will Need to Create a Matte Effect in Photoshop
Adobe Photoshop or any other editing software that lets you adjust curves.
A great photograph that feels moody already. This technique works best with dark, late-afternoon shots or artificial low-cal.
I propose not to apply it for bright daylight scenes without significant shadows. It would not add together any plus, but potentially mess upwards the exposure.
How to Create a Matte Look in Photoshop – Stride by Step
There are countless means to create a matte wait in Photoshop. I will show you the 3 near straightforward and practical methods.
Note: for easier comparison, I only practical the adjustments to the lesser half of the photo.
Using the Curves Adjustment Layer to Create a Matte Look
Curves are essential functions. On the horizontal centrality is the first exposure. On the vertical axis, you lot can set how you want to adjust that, assigning a new level to the original levels.
1. In one case you accept imported your photograph into Photoshop, add a Curves Adjustment Layer using the adjustments panel. 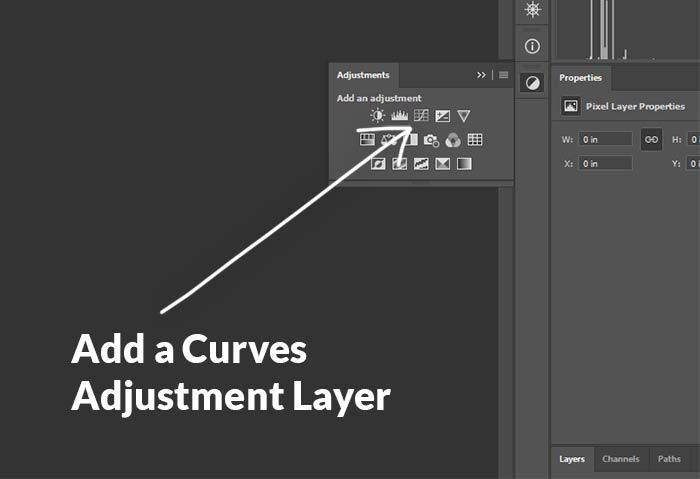
2. Take hold of the point on the lesser left corner, and pull it upwards.By doing this, you lot enhance the darkest parts of the photo. 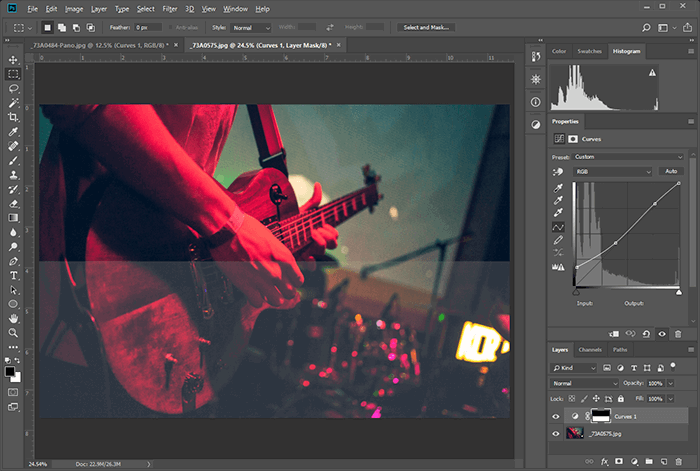
3.Adjust the exposureto get a nice, gradual transition between the darker tones and the rest of the prototype.
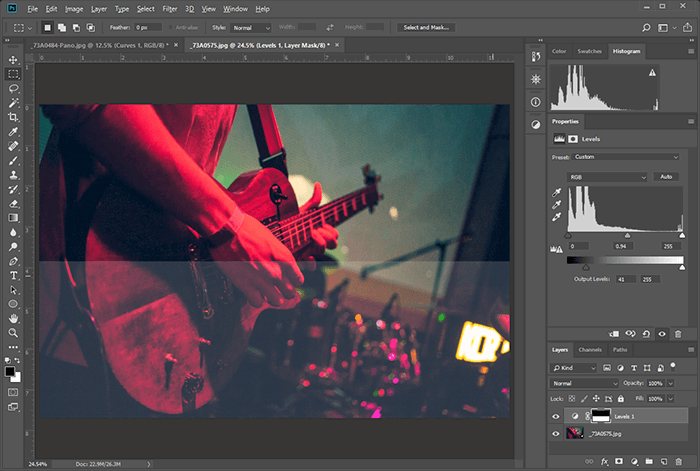
Using the Levels Adjustment Layer
1.Create a Levels Adjustment Layer.
2.Adjust the left push buttonon the black-to-white calibration to your taste. This adjustment does the same as pulling upwardly the left side of curves.
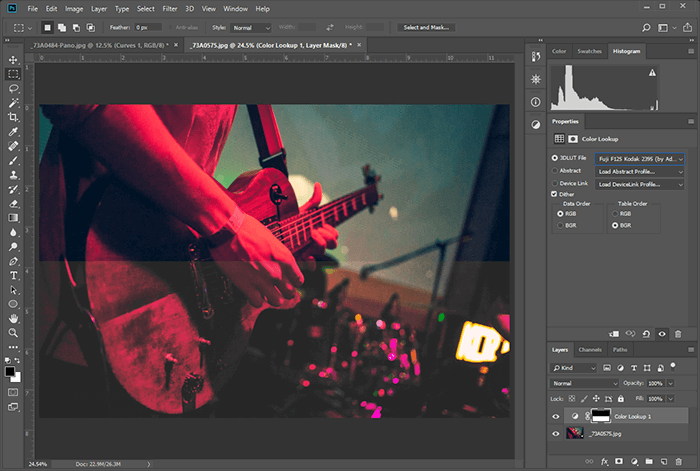
Using Colour Lookup
i. Create a Colour Lookup Adjustment Layer
2. Cull a Lookup that gives y'all a matte expect. Non all Lookups do it, but there are many. Each of them has a colour contour also.
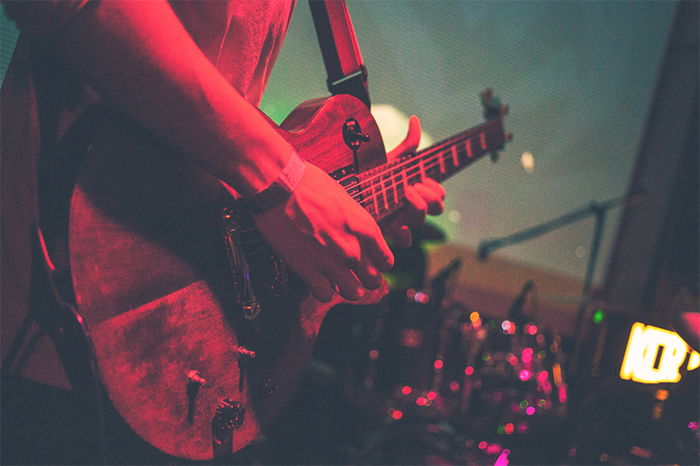
For this shot of a guitarist, I felt that the Fuji F125 Kodak 2395 was the all-time i. Endeavor a few, and cull the ane you like best.
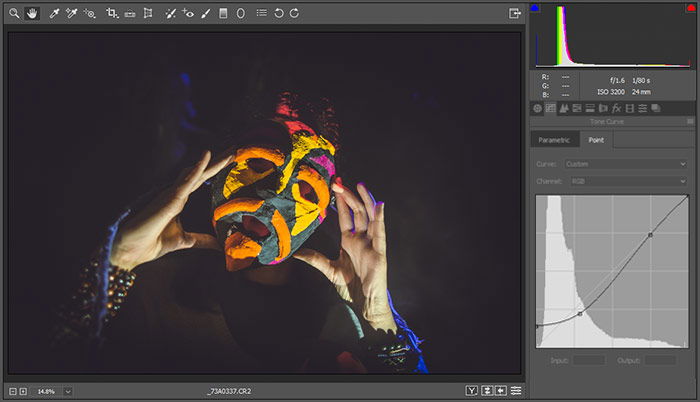
Creating a Matte Look With Curves in Camera Raw / Lightroom
You can add a matte effect the same way as described in the curves adjustment layer section. Yous'll observe Curves on the second console of either software.
Determination
This technique is simple yet powerful. A lot of photographers use it every twenty-four hours.
However, utilise it with circumspection. Be conscientious not to hide important details from the shadows, unless that is your intention. Apply the matte effect to smooth out the darker areas where needed.
As with every technique, ascertain your photo using the Photoshop tools, only do not let the tools ascertain your epitome.


How To Make Matte Background In Photoshop,
Source: https://expertphotography.com/matte-look-photoshop/
Posted by: tyrephost1941.blogspot.com
0 Response to "How To Make Matte Background In Photoshop"
Post a Comment