

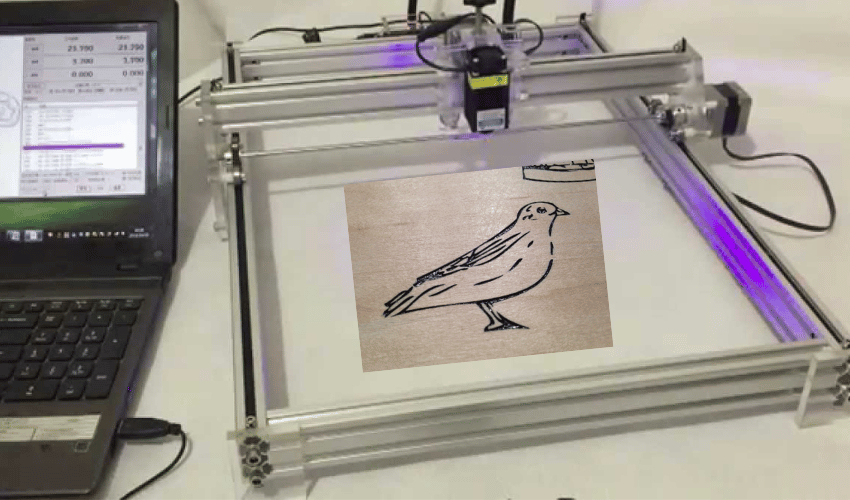
How To Make Laser Engraving Darker On Wood
Laser engraving on metallic or acrylic is relatively easy but laser engraving on woods is a whole new ball game and how to darken laser engraving on wood. Forest, a natural material, has a unique organic composition. This explains why you will get unlike results on different types of forest when laser engraving.
In fact, you tin get different results when engraving the same type of wood because of the inconsistencies in the composition of forest. One of the challenges of laser engraving on forest is the inability to create visual contrast.
Many a time, the engraved parts comport the same contrast with the balance of the wood. This doesn't practice justice to the engraved parts. Thankfully, yous can darken your engraving and have desirable results in the cease.
How to darken laser engraving on wood
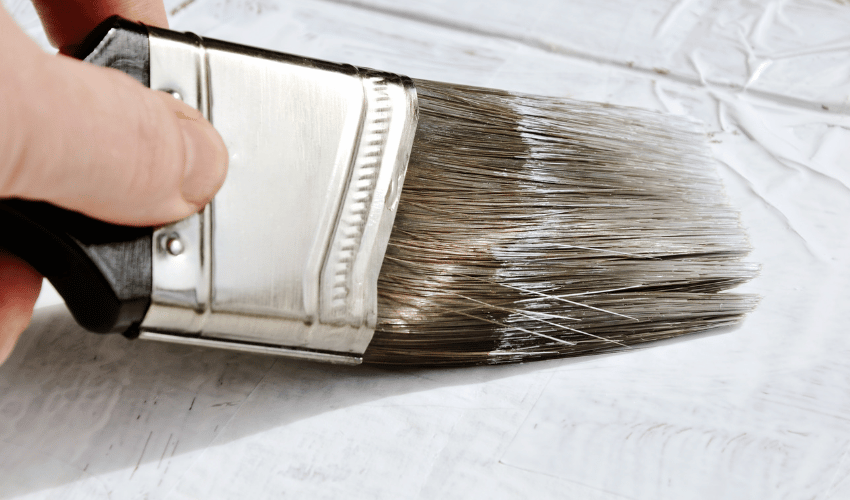
The standard approach to darkening light amplification by stimulated emission of radiation engraving on woods is using a paint or color make full. Nonetheless, over time, the paint or color migrates to the wood veins and canals creating a graphic mess. To counter this challenge, employ some liquid shoe shine to darken your engraving. This is awesome if you need a higher contrast. Only utilize the smoothen using a foam applicator over the wood surface.
If you have lighter-colored woods such as bamboo, hickory, alder, maple, and ash, the all-time thing to do would be to run the laser out of the focus. This minimizes the vaporization of the wooden textile and leaves greater results behind. If these methods aren't forthcoming, use a color-filling method where you spray a clear paint to block the veins then spray a darker paint afterward.
As well Read: Laser Engraving on Wood – everything you demand to know
All-time methods to darken laser engraving on wood
There are three chief strategies that are used to darken laser engraving on wood. These are;
- Paint filling
- Using liquid or shoe shine
- Colour-filling
Allow usa take a look at each of these in greater detail.
Pigment filling
Paint filling is equally straightforward equally it sounds. Information technology involves the application of color or paint to darken engraved parts on the woods. Here is a detailed education for doing this:
- To avoid a messy and unattractive job, begin past sealing the entire wood surface with masking record.
- Proceed to laser engrave on your wood. Adjust the laser settings to go the correct depth of the engraving. Don't be agape to engrave 1 piece over and over again until you go the perfect result.
- Apply varnish of the same color to the gutter and allow it dry well. You tin can skip this pace if your tape becomes too wet.
- Using a small brush, fill the laser engraving with color or paint filling. Any acrylic paint will get you lot dwelling house.
- Finally, peel the masking tape to reveal a nighttime engraving. Please note that the paint might still bleed at this indicate. If it does, sand the surface with fine sandpaper for better outlines.
As earlier mentioned, colour or paint filling is slowly taking a backseat in many laser engraving projects washed on wood. The canals and veins of solid products always get in the fashion. Fifty-fifty if you lot are an expert in using sandpaper, you might never actually accomplish a adept effect.
Also Read: Tin you lot light amplification by stimulated emission of radiation engrave on painted wood
Apply of liquid shoe polish
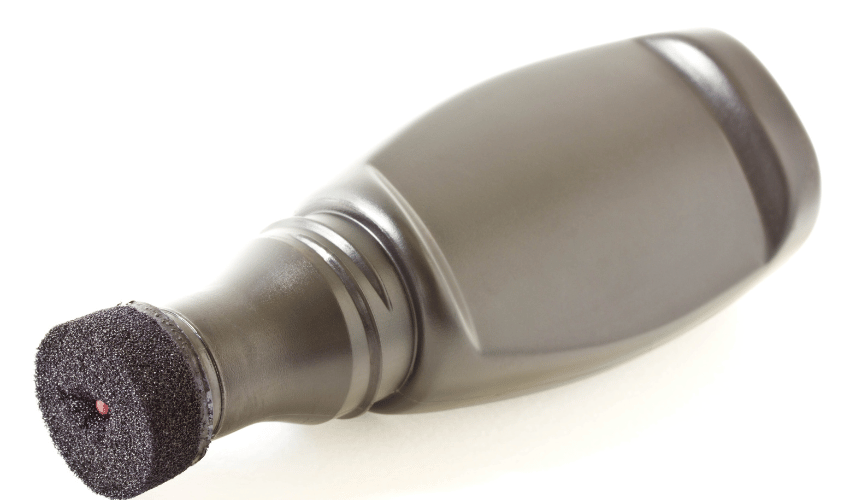
If you are working with darker wood types such as walnut, liquid shoe smooth works similar charm. This is because it gives a darker contrast despite the deep color of the wood. Plus, information technology is pretty easy on your wallet. Needless to say, less expensive liquid shoe polish is actually the very all-time for this project as it is easier to clean up.
Apply a foam applicator to spread your polish on the surface of the wood. Even if the polish migrates, it is less likely to evidence. If you don't have the liquid polish, become ahead and use the paste. It will achieve the same results only that it is a existent challenge cleaning it with a towel or rag.
A good fob to get a practiced job when darkening laser engraving on lighter-colored wood is to run the laser out of focus. Even with the aforementioned batch of forest plaques, yous are bound to get different results. For example, if you embark on engraving 10 plaques of maple, bamboo, maple, or alarm, only v of them might turn out well. What then volition y'all exercise about the residue of them? This is where running the laser out of focus comes in.
Substantially, when yous run your laser off the focus, yous minimize the vaporization of your material and leave sufficient residual backside. You also increase the size of the light amplification by stimulated emission of radiation dot and ultimately have more overlap in your graphics. Furthermore, when you run an additional pass on your laser, you improve its legibility.
Color-filling
This is often the last card to pull when all others have failed. Back in the day, people masked the surface of the woods (usually calorie-free-colored) using a transfer record or paper premask. They would then go on to engrave into the wood by the mask later which they would spray paint with dark brown or black paint.
Once the paint was dry, they would then remove the masking. Although the method worked, it still presented the challenge of paint migration. To avoid this, the electric current technologies spray clear paint before applying the darker one.
In the below YouTube Tutorial you volition acquire the procedure of back-filling or color filling your engravings on woods:
Tips and tricks to darken light amplification by stimulated emission of radiation engraving on wood
If you are interested in creating contrast when engraving on wood, there are a few things you lot should do to attain top-notch results.
- Go for lighter-colored woods
Night forest is good for a number of projects only when it comes to laser engraving, lighter wood always carries the mean solar day. The truth is that the base color of wood goes a long mode in determining the end result of the woods. It is therefore important to consider the color of your wooden material for a skilful outcome.
Basically, darker wood obscures the laser engraving marks making text or photos difficult to recognize. Lighter wood, on the other hand, develops an attractive deep and dark etching giving the appearance of well-defined engravings for better visibility.
- Consider the resin content
The resin or sap content is a wood parameter that determines if your wood volition burn darker or lighter. If you want a night fire, go for wood with a loftier resin content. Examples include Alder or Ruddy wood. Otherwise, if y'all want to go light for a certain awarding, stick with forest with a lower resin content.
The simplest style to know the resin content of your wood is to use a wood laser car. Engrave your company's logo over a specific spot that won't have an event on the personalization of the product. This test lets you test your product and figure out the lightness or darkness of its burn.
- Avoid wood with too much streaking
Although streaks on forest expect fantastic in furniture, they are not the best when it comes to laser engraving. This is because they steal attending away from the actual engraving. When looking for wood to light amplification by stimulated emission of radiation engrave, your best bet is to go for the i with minimal streaks and those with a smoothen and consistent grain.
- The all-time species
Finally, the option of wood to utilise matters. The market is filled with a vast drove of them. If you are a newbie in the industry, yous might desire to go for those that are easy to work with. The best is Alder because it ticks all the boxes. It has a lite color, minimal streaking, and an awesome supple texture. Cherry comes at a shut 2d being light-colored and loftier in resin content.
All the same, information technology has quite a high level of streaking only all the same passes for good species for laser engraving projects. Maple is likewise excellent for starters since information technology is light in colour and has a lite streaking. Once you master your craft, you can switch to other species such as bamboo, plywood, pine, and hardwood.
Should you need any aid in choosing the best woods for your laser cutting and engraving projects then bank check out this post: Best Materials for Laser Engraving
Products you lot can make light amplification by stimulated emission of radiation engraving projects on wood

Wood is an amazing décor item and there are countless possibilities when it comes to things you can engrave on woods for both aesthetical and functional purposes. Here are some ideas to get you started.
- Photo engravings – photoengraving is a creative and timeless idea of preserving memories. Engrave your family's photos or memories or mahogany plaques and line them along your walls for a better celebration of your past.
- Inlays – a light amplification by stimulated emission of radiation system lets y'all cut and engrave into the wood for the creation of inlays for your awards, cabinets, guitars, just to mention a few.
- Personalization – if yous are in business, laser engraving on wood can assist you personalize your products to creates a personal and unique experience for your customers. These include phone cases, skateboards, knife handles, and more than. You can fifty-fifty convert these into perfect gifts for your friends or family members.
- Signs/signage – coffee store or boutique owners tin likewise brand use of light amplification by stimulated emission of radiation engraved wood signs to attract customers into their shops.
- Cardinal bondage – if you have a knack for rectangular, engraved key bondage, go ahead and brand this a DIY project. Write your family's name there and savour the personal feel information technology gives.
- Photo albums – apart from photo engraving, you tin also create a wooden album with some blazon of text or photo on it.
- Photo frames – wooden photo frames are cute décor items in our homes. Set yourself apart past laser engraving your frames with some text or logo that reflects the dazzler of family unit or friendship.
Bank check Out Our Buying Guide: All-time laser engraver for woods and metal
Determination
Unlike metal or acrylic, woods is a challenging material to create contrast on when doing laser engraving. Information technology is characterized by inconsistencies not to mention the veins and canals that ever threaten to bleed the colour out.
However, in that location are a few strategies that bypass this obstacle and offer tremendous results in the finish. If you choose the right wood species, the best laser engraver and follow the tips shared in this article, y'all should be able to create breathtaking wood laser engravings.
Source: https://laserengravingtips.com/how-to-darken-laser-engraving-on-wood/
0 Response to "How To Make Laser Engraving Darker On Wood"
Post a Comment